Using the Laravel 10 Socialite Login with Linkedin Tutorial Example, you need to Laravel Socialite to implement the Linkedin login in laravel application. The Laravel Socialite package simplifies the OAuth authentication process. Follow these steps to enable LinkedIn login in Laravel application:
To implement the Linkedin social login in Laravel app, you need to create or generate the linkedin client id and secret. If you do not know how to get the client id and secret from Linkedin Developer Console, then you can create Linkedin App in Linkedin Developer Console by following the steps given below.
Laravel Login with LinkedIn Example
Follow the below steps to implement Laravel Socialite Login with Linkedin.
- Step 1: Install Laravel App
- Step 2: Setup Database Connection
- Step 3: Configure Socialite Package
- Step 4: Add Linkedin Property in Users Table
- Step 5: Add Linkedin Client ID and Secret
- Step 6: Create a Controller
- Step 7: Setup Routes
- Step 8: Update Login View
- Step 9: Start Laravel App & Test
Download Laravel App
First, create a fresh Laravel 10 application by adding the following command in the terminal for login with the Linkedin social network.
composer create-project --prefer-dist laravel/laravel laravel-login-with-linkedinGo inside the app:
cd laravel-login-with-linkedinSetup Database
Next, update database credentials in the .env file for connecting your data with your app.
 DB_CONNECTION=mysql
 DB_HOST=127.0.0.1
 DB_PORT=3306
 DB_DATABASE=db_name
 DB_USERNAME=root
 DB_PASSWORD=
Install Socialite Package
Install the Laravel Socialite package by running the following command in your Laravel project’s root directory.
composer require laravel/socialiteAfter installation, add the Socialite service provider to the providers array in config/app.php:
'providers' => [
     // Other service providers…
 Laravel\Socialite\SocialiteServiceProvider::class,
],

'aliases' => [
// Other aliases…
'Socialite' => Laravel\Socialite\Facades\Socialite::class,
],
Add Linkedin Property in Users Table
To manage the sign in with LinkedIn, we have to insert the new field in the existing user table, So generate first the migration file using the following command.
php artisan make:migration add_social_auth_id_fieldAfter the open the database/migration/add_social_auth_id_field.php file and update following code on it.
<?php
use Illuminate\Database\Migrations\Migration;
use Illuminate\Database\Schema\Blueprint;
use Illuminate\Support\Facades\Schema;
class AddSocialAuthIdField extends Migration
{
/**
     * Run the migrations.
     *
     * @return void
     */
    public function up()
    {
        Schema::table('users', function ($table) {
            $table->string('oauth_id')->nullable();
            $table->string('oauth_type')->nullable();
        });
    }
    /**
     * Reverse the migrations.
     *
     * @return void
     */
    public function down()
    {
        Schema::table('users', function ($table) {
            $table->dropColumn('oauth_id');
           $table->dropColumn('oauth_type');
         });
    }
}
Next, open the app/Models/User.php file and add new social auth fields within the file.
<?php

namespace App\Models;

use Illuminate\Contracts\Auth\MustVerifyEmail;
use Illuminate\Database\Eloquent\Factories\HasFactory;
use Illuminate\Foundation\Auth\User as Authenticatable;
use Illuminate\Notifications\Notifiable;
use Laravel\Fortify\TwoFactorAuthenticatable;
use Laravel\Jetstream\HasProfilePhoto;
use Laravel\Sanctum\HasApiTokens;

class User extends Authenticatable
{
    use HasApiTokens;
    use HasFactory;
    use HasProfilePhoto;
    use Notifiable;
    use TwoFactorAuthenticatable;

    /**
     * The attributes that are mass assignable.
     *
     * @var array
     */
    protected $fillable = [
        'name',
        'email',
        'password',
        'oauth_id',
        'oauth_type'
    ];

    /**
     * The attributes that should be hidden for arrays.
     *
     * @var array
     */
    protected $hidden = [
        'password',
        'remember_token',
        'two_factor_recovery_codes',
        'two_factor_secret',
    ];

    /**
     * The attributes that should be cast to native types.
     *
     * @var array
     */
    protected $casts = [
        'email_verified_at' => 'datetime',
    ];

    /**
     * The accessors to append to the model's array form.
     *
     * @var array
     */
    protected $appends = [
        'profile_photo_url',
    ];
}
Finally, execute command to migrate new values into the user tabel:
php artisan migrateAdd Linkedin Client ID and Secret
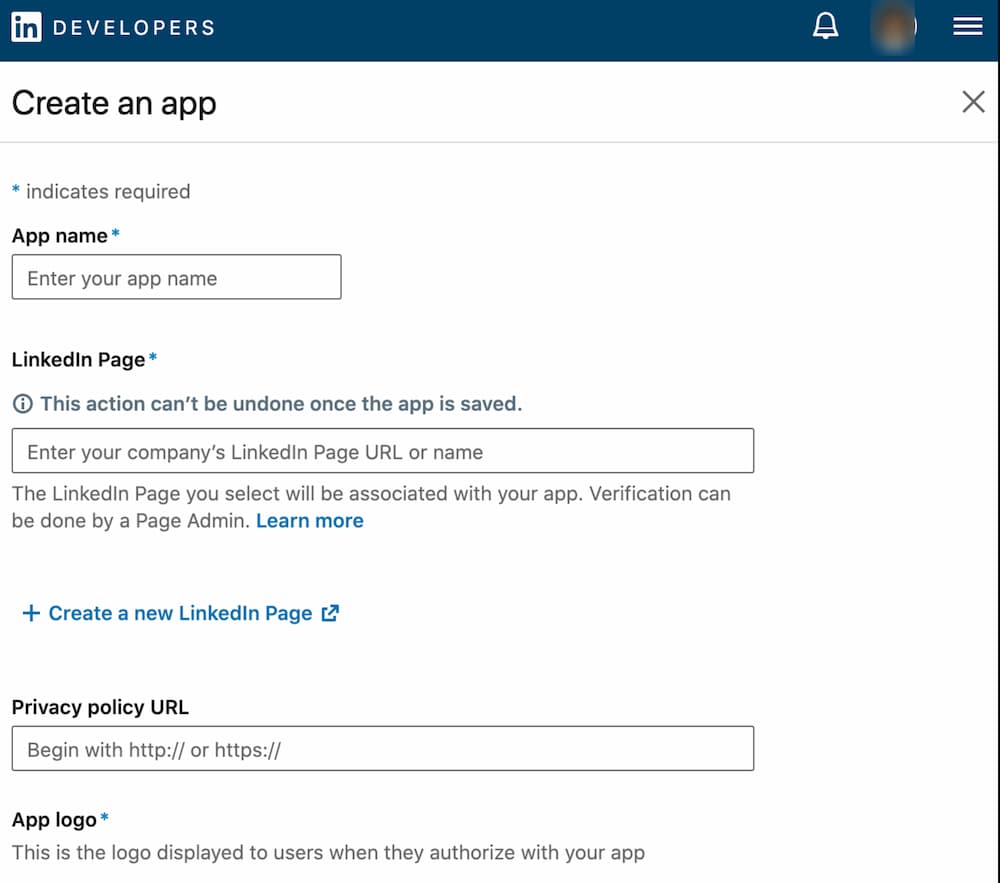
Let us start creating the client id and secret by visiting the Linkedin developers account:
Click on Create an app page, you have to add the app name, your LinkedIn page name, or URL; if you don’t have, please create lastly add the app logo and continue to the next step:
Your linkedin app has been created; you will see the various tabs; however, you have to open the Auth tab. Here in the Application credentials section, you have to copy the Authentication keys to add to the laravel app.
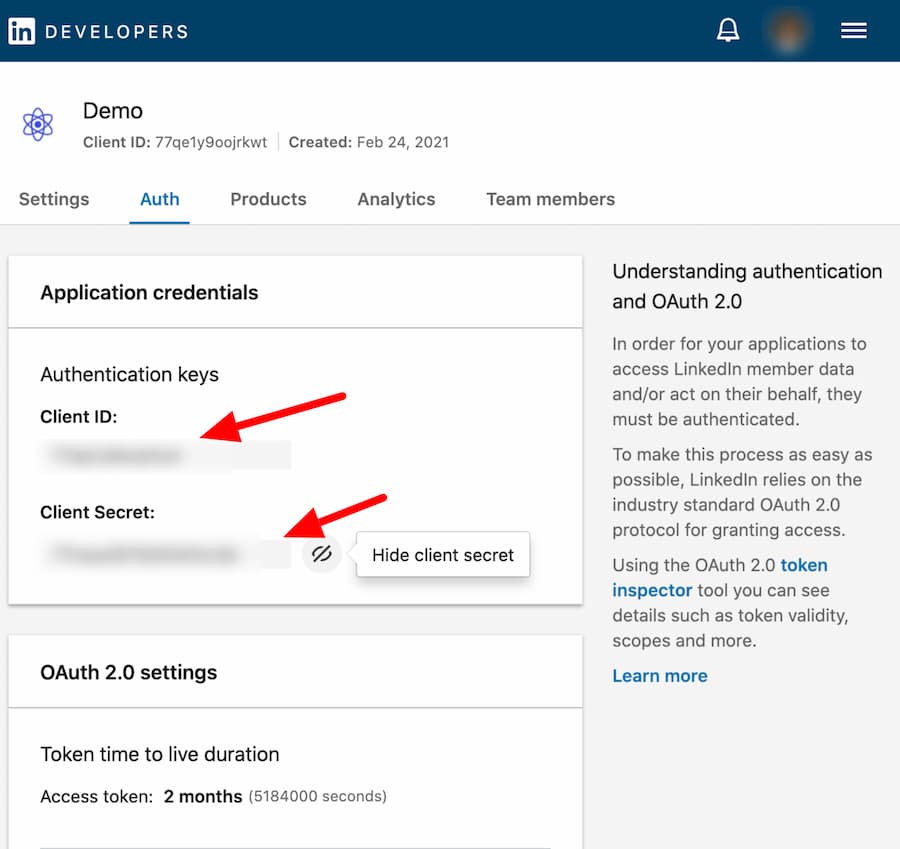
We have created the linkedin app and got the client id and secret; in the subsequent step, open the config/services.php file and register the linkedin credentials as given below:
return [
    ...
    'linkedin' => [
        'client_id' => 'xxxxxxxxxxx',
        'client_secret' => 'xxxxxxxxxx',
        'redirect' => 'http://127.0.0.1:8000/auth/linkedin/callback',
    ],
]
Create Controller
Now you need to create a new controller using the artisan command.
php artisan make:controller SocialControllerAfter creating the controller, open the app/controllers/SocialController.php file and add the below code on it.
<?php
namespace App\Http\Controllers;
use Illuminate\Http\Request;
use Auth;
use Exception;
use Socialite;
use App\Models\User;

class SocialController extends Controller
{
    public function linkedinRedirect()
    {
        return Socialite::driver('linkedin')->redirect();
    }

    public function linkedinCallback()
    {
        try {

            $user = Socialite::driver('linkedin')->user();

            $linkedinUser = User::where('oauth_id', $user->id)->first();

            if($linkedinUser){

                Auth::login($linkedinUser);

                return redirect('/dashboard');

            }else{
                $user = User::create([
                    'name' => $user->name,
                    'email' => $user->email,
                    'oauth_id' => $user->id,
                    'oauth_type' => 'linkedin',
                    'password' => encrypt('admin12345')
                ]);

                Auth::login($user);

                return redirect('/dashboard');
            }

        } catch (Exception $e) {
            dd($e->getMessage());
        }
    }
}
Add Routes for Laravel Linkedin Login
Furthermore, go to the routes/web.php file and define a couple of routes to handle auth requests:
<?php
use Illuminate\Support\Facades\Route;
use App\Http\Controllers\SocialController;
/*
|--------------------------------------------------------------------------
| Web Routes
|--------------------------------------------------------------------------
*/

Route::get('auth/linkedin', [SocialController::class, 'linkedinRedirect']);
Route::get('auth/linkedin/callback', [SocialController::class, 'linkedinCallback']);
Set Up Login View
Ultimately, get inside the views/auth/login.blade.php ready-made template, create a login with linkedin button, add the route which allows making the login request:
Resources/Views/Auth/register.blade.php
<hr>
<div class="form-group row mb-0">
     <div class="col-md-8 offset-md-4">
        <a href="{{ url('auth/linkedin') }}" class="btn btn-primary"><i class="fa fa-linkedin"></i> Linkedin</a>
    </div>
</div>
Resources/Views/Auth/login.blade.php
<div class="form-group row mb-0">
     <div class="col-md-8 offset-md-4">
       <a href="{{ url('auth/linkedin') }}" class="btn btn-primary"><i class="fa fa-linkedin"></i> Linkedin</a>
    </div>
</div>
Start Laravel App
Now start the development server using running the below command.
php artisan serveAfter running this command you can check your browser the LinkedIn login is updated in your register and login pages.
http://localhost:8000/loginSo the Laravel login with Linkedin is completed now. If you have any question please comment below for any question. Follow us on twitter for more update’s.