Uploading images in Laravel is a simple process and easy process. Using the Laravel Image Upload tutorial, you will learn How to Upload Image in Laravel 10 application Step by Step. Laravel provides us prebuild file uploading system to upload image in Laravel with proper validation like maximum size and the file extension should be peg, png, jpg, gif or SVG etc and how to upload the images in the storage folder.

How to Upload Image in Laravel 10
Follow the following steps to how to upload images in Laravel application;
- Step 1: Download Laravel App
- Step 2: Setup Database Credentials
- Step 3: Create Model & Migration
- Step 4: Add Routes
- Step 5: Create Controller
- Step 6: Create Blade View File
- Step 7: Run Laravel Application
1. Download Laravel App
First, download a fresh Laravel project using the following command.
composer create-project --prefer-dist laravel/laravel laravel-appGo inside the app
cd laravel-app2. Setup Database Credentials
Now open the .env file and update the database credentials such as database name, username, password etc.
DB_CONNECTION=mysql
DB_HOST=127.0.0.1
DB_PORT=3306
DB_DATABASE=laravelblog #your_database_name
DB_USERNAME=root #your_database_username
DB_PASSWORD= #your_database_password
Now you can add you tables easily with mysql database.
3. Create Model & Migrations
Now, generate the Image model and migration file using the following command.
php artisan make:model Image -m
Next, open your database/migrations/2019_09_01_114306_create_images_table.php file and put the below code on it.
<?php

use Illuminate\Support\Facades\Schema;
use Illuminate\Database\Schema\Blueprint;
use Illuminate\Database\Migrations\Migration;
class CreateImagesTable extends Migration {

public function up() {
       Schema::create('images', function (Blueprint $table) {
            $table->id();
            $table->string('name');
            $table->string('path');
            $table->timestamps();
        });
    }

    /**
     * Reverse the migrations.
     *
     * @return void
     */
    public function down()
    {
        Schema::dropIfExists('images');
    }
}
Once you have updated your migration, run the below command to create your migrations (database table).
php artisan migrate
Add Fillable Property: You need to add the fillable properties in your model. Open app\Models\Image.php File and update the fillable properties.
protected $fillable = ['name', 'path'];
#4 Create Routes for Upload Images in Laravel
Now open the routes/web.php file and update the following routes on it. One route is show the upload image form and another to store the image in database and storage directory.
<?php

use Illuminate\Support\Facades\Route;
use App\Http\Controllers\ImageController;

Route::get('images', [ImageController::class, 'index']);
Route::post('images', [ImageController::class, 'store'])->name('images.store');
5. Create Controller
Now you need to generate an Image Controller using the below command.
php artisan make:controller ImageControllerNow you need to open the app/Http/Controllers/ImageController.php file and upate the following command on it.
<?php
namespace App\Http\Controllers;
use Illuminate\Http\Request;
use App\Models\Image;
class ImageController extends Controller
{
public function index()
{
return view('images');
}
public function store(Request $request)
{
$request->validate([
'image' => 'required|image|mimes:jpeg,png,jpg,gif,svg|max:2048',
]);
$image = new Image;
if ($request->file('image')) {
$imagePath = $request->file('image');
$imageName = $imagePath->getClientOriginalName();
$path = $request->file('file')->storeAs('uploads', $imageName, 'public');
}
$image->name = $imageName;
$image->path = '/storage/'.$path;
$image->save();
return back()->with('success', 'Image uploaded successfully');
}
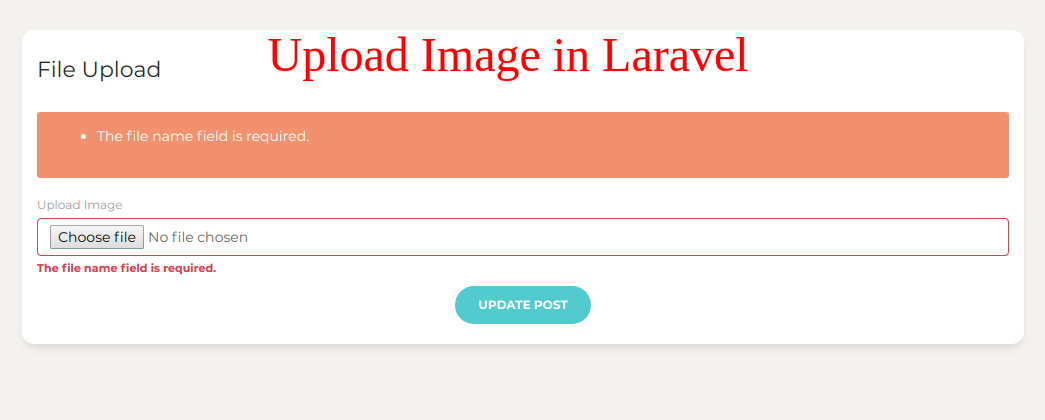
}6. Create Blade File
After the all steps now we will create blade view file to show the image upload form in laravel. You just need to create a “images.blade.php” file in the resources/views directory.
Now you can open the resources\views\images.blade.php file and update the below code on it.
<!DOCTYPE html>
<html>
<head>
  <meta charset="UTF-8">
  <meta name="viewport" content="width=device-width, initial-scale=1.0">
  <meta http-equiv="X-UA-Compatible" content="ie=edge">
  <title>Laravel Image Upload Example</title>
  <link rel="stylesheet" href="https://cdnjs.cloudflare.com/ajax/libs/twitter-bootstrap/4.1.3/css/bootstrap.min.css" />
</head>
<body>
<div class="container mt-4">
  <h2>Laravel Image Upload Example</h2>
    @if(session()->has('success'))
        <div class="alert alert-success">
            {{ session()->get('success') }}
        </div>
    @endif
    <form method="post" action="{{ route('images.store') }}" enctype="multipart/form-data">
      @csrf
      <div class="form-group">
          <input type="file" name="image" class="form-control{{ $errors->has('image') ? ' is-invalid' : '' }}" >
          @if ($errors->has('image'))
              <span class="invalid-feedback" role="alert">
                  <strong>{{ $errors->first('image') }}</strong>
              </span>
          @endif
      </div>
      <div class="form-group">
        <button type="submit" class="btn btn-success">Save</button>
      </div>
    </form>
</div>
</body>
</html>
7. Create “uploads” Directory
Where you want to upload your image, So you need to create new directory “uploads” on public folder with full permission. If you don’t know how to give file permission run below command.
sudo chmod -R 777 public/uploads
8. Run Development Server
Now, it’s time to test the image upload in Laravel example. So run the dev server to run your application.
php artisan serverNow hit the below URL in your browser
http://localhost:8000/images
1 thought on “Laravel Image Upload Tutorial with Example”