Throughout the Laravel 10 Socialite Login with Facebook tutorial, you will learn step by step guide on Socialite Login with Facebook Account In Laravel 10. Facebook (FB) login implementation is very easy & simple in Laravel app using the socialite package.
Social login is a mechanism that propels the user’s expectation forward to access and register within the application. Consequently, we are creating a simple feature to log in with Facebook in the Laravel application.
Socialite Login with Facebook Account In Laravel 10
Follow the following steps to integrate Socialite Login with Facebook Account In Laravel 10.
- Step 1: Install Laravel 10 App
- Step 2: Connect Database With App
- Step 3: Create Laravel Authentication
- Step 4: Install Socialite Package
- Step 5: Get secrets from facebook
- Step 6: Make Migration & Add FIllable Property
- Step 7: Add Routes
- Step 8: Create Social Auth Controller
- Step 9: Add Facebook Button in Login Page
- Step 10: Start Development Server
Download Laravel App
First, you need to create a fresh laravel 10 application by adding the following command in the terminal to implementing login with Facebook in laravel;
composer create-project --prefer-dist laravel/laravel laravel-facebook-loginGo inside the app:
cd laravel-facebook-loginConnect Database to App
Now to your project root .env file and set up the database credentials just add DB name, user and database password on it.
  DB_CONNECTION=mysql
  DB_HOST=127.0.0.1
  DB_PORT=3306
  DB_DATABASE=here your database name here
  DB_USERNAME=here database username here
  DB_PASSWORD=here database password here
Create Laravel Authentication
Now the basic authentication we need to run the auth command of Laravel just running the below command.
In Laravel 5 or below:
php artisan make:authIn Laravel 6+ version:
composer require laravel/ui
php artisan ui vue --auth
npm install
npm run devInstall & Configure Socialite Package
Now install the laravel socialite package for Facebook login. Open the command prompt and run below command.
composer require laravel/socialiteAfter successfully installing the Socialite package add allies and providers in config/app.php.
'providers' => [
      // Other service providers…
  Laravel\Socialite\SocialiteServiceProvider::class,
 ],

'aliases' => [
 // Other aliases…
 'Socialite' => Laravel\Socialite\Facades\Socialite::class,
 ],
Now, configure the Facebook app with this Laravel app. So, open your laravel Facebook social login project in any text editor. Then navigate to the config directory and open the service.php file and add the client id, secret and callback URL:
config\services.php
'facebook' => [
    'client_id' => env('FACEBOOK_CLIENT_ID'),
    'client_secret' => env('FACEBOOK_CLIENT_SECRET'),
    'redirect' => env('FACEBOOK_REDIRECT'),
  ],
Get secrets from facebook
Here we get CLIENT ID and CLIENT SECRET for Facebook login button in laravel based project, So we need to go https://developers.facebook.com/ and create an app. Create an app in the config/service.php file just like below.
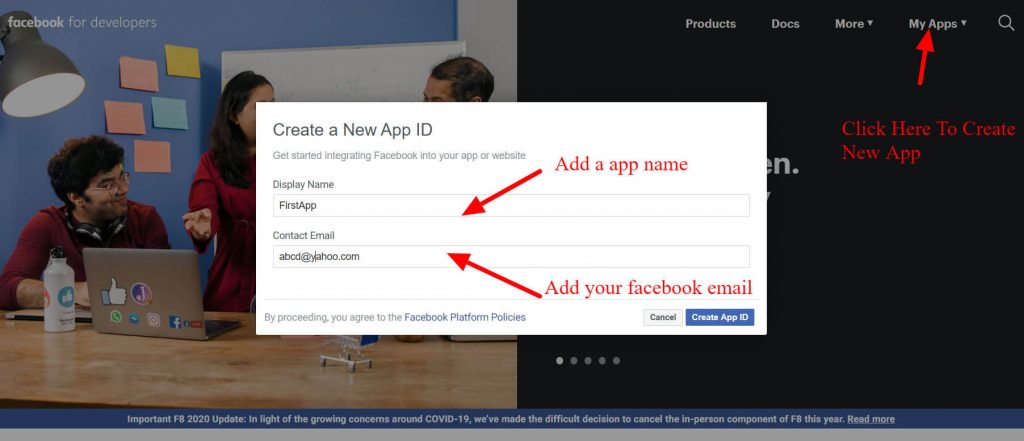
1) First Go to My Apps and click create the new app you get a popup just like below. add your new app name and your Facebook email id on it.
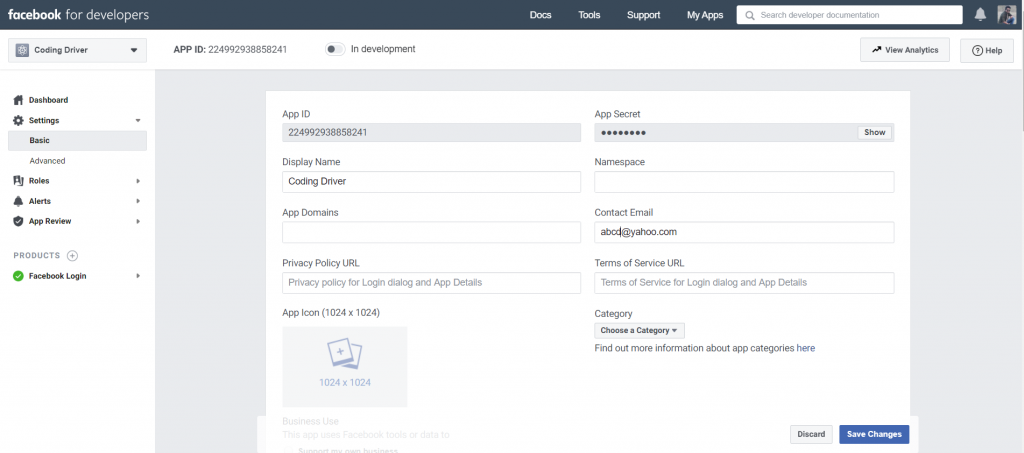
2) Next, go to Settings -> Basic, copy your App Id and App Secret and add in your .env file we have display below. Follow the next step before going the facebook login step.
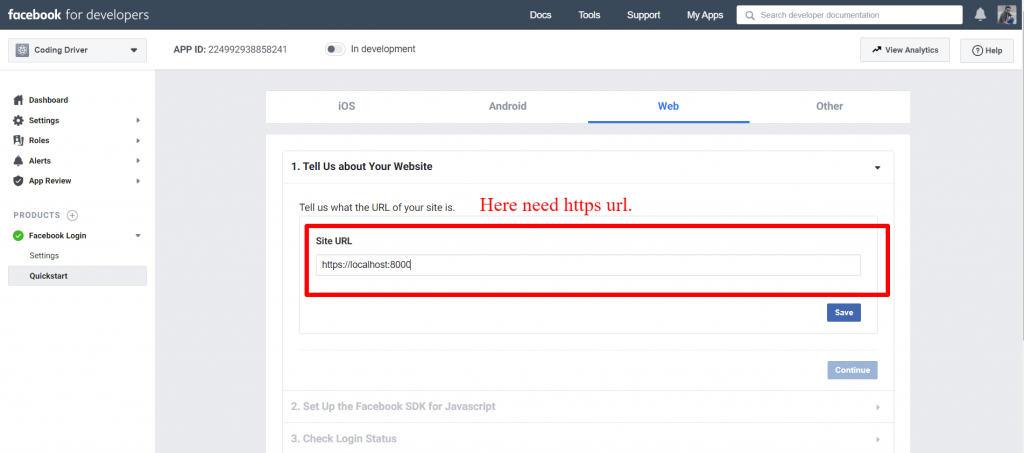
3) Now click on the ‘+’ button beside ‘PRODUCTS’, and select quickstart you got a window where you see four options (‘ios’, ‘android’, ‘web’, ‘other’) select web option then your see below image where you need to add your website URL: https://localhost:8000 and click on ‘Save’ as shown below…
4) Then go to Facebook Login -> Settings, scroll down to ‘Valid OAuth Redirect URL’ and add your callback /redirect URL: https://localhost:8000/callback and Save changes as illustrated below…
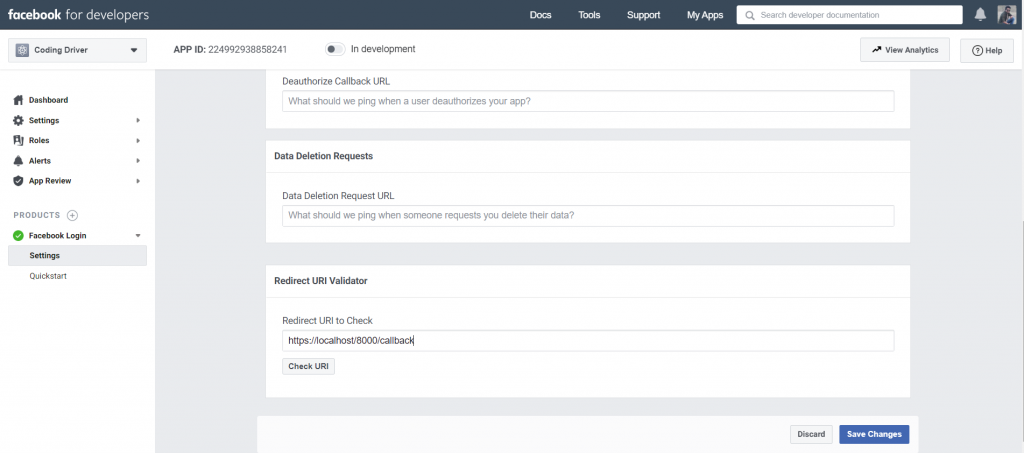
Now our App settings is done, copy your client id, client secret and redict your and save in .env file.
FACEBOOK_CLIENT_ID=2249929###
FACEBOOK_CLIENT_SECRET=1ea76a73f#########
FACEBOOK_REDIRECT=http://localhost:8000/callback
Create Model & Migration
In this step, use the following command to create migration file for add column in database table:
php artisan make:migration add_social_login_fieldAfter that, open the add_social_login_field.php file, which is navigated in database/migration directory and add the following code to it:
<?php

use Illuminate\Support\Facades\Schema;
use Illuminate\Database\Schema\Blueprint;
use Illuminate\Database\Migrations\Migration;

class AddSoicalLoginField extends Migration
{
    /**
     * Run the migrations.
     *
     * @return void
     */
    public function up()
    {
        Schema::table('users', function ($table) {
            $table->string('facebook_id')->nullable();
        });
    }

    /**
     * Reverse the migrations.
     *
     * @return void
     */
    public function down()
    {
        Schema::table('users', function ($table) {
            $table->dropColumn('facebook_id');
         });
    }
}
Now open app/User.php and fillable property facebook_id inside the fillable array.
protected $fillable = [
   'name', 'email', 'password', 'facebook_id'
  ];
After that, execute the following command on cmd to create tables into your selected database:
php artisan migrateMake Routes
In this step, Go to routes directory and open web.php file. Then add the following routes into web.php file:
app/routes/web.php
use Illuminate\Support\Facades\Route;
use App\Http\Controllers\Auth\SocialController;

 Route::get('/', function () {
    return view('welcome');
});

Auth::routes();

Route::get('redirect', [SocialController::class, 'redirect'])->name('redirect');
Route::get('callback', [SocialController::class, 'callback'])->name('callback');
Route::get('home', [HomeController::class, 'index'])->name('home');
Create Social Controller
In this step, Execute the following command on terminal to create SocialController.php file:
php artisan make:controller SocialControllerAfter that, Go to app/http/controllers directory and open SocialController.php add the following code:
<?php
 namespace App\Http\Controllers;
 use Illuminate\Http\Request;
 use Validator,Redirect,Response,File;
 use Socialite;
 use App\Models\User;

 class SocialauthController extends Controller
 {

  public function redirect()
  {
     return Socialite::driver('facebook')->redirect();
  }

 public function callback()
 {
    try {

        $user = Socialite::driver('facebook')->user();
        $create['name'] = $user->getName();
        $create['email'] = $user->getEmail();
        $create['facebook_id'] = $user->getId();

        $userModel = new User;
        $createdUser = $userModel->addNew($create);
        Auth::loginUsingId($createdUser->id);

        return redirect()->route('home');

    } catch (Exception $e) {
        return redirect('redirect');
    }
  }

 }
Add Facebook Button in Login Page
In this step, integrate facebook login button into login.blade.php file. So, navidate resources/views/auth direcotory open login.blade.php and plade the below code on it:
Resources/Views/Auth/login.blade.php
<br />
  <div class="form-group">
  <div class="col-md-8 col-md-offset-4">
    <a href="{{url('/redirect')}}" class="btn btn-primary">Login with Facebook</a>
  </div>
</div>
Start your Application
After successfully update all run the development server just adding below command in terminal.
php artisan serveAfter this go to browser and check using the login page.
https://localhost:8000/That’s it! You have successfully implemented Facebook login using Laravel Socialite. You can customize the authentication and registration logic according to your specific requirements.
Leave a Reply
Your email address will not be published. Required fields are marked *
Comment